Guide · Call History
Call history: finding a call and seeing what happened in it
The Call History screen shows every call that went through the PBX: who called, where the call reached, who answered, how long it lasted and whether it has a recording. In this guide: choosing a range and searching, what each status means, the call details, listening to a recording, a link to a call, and export to Excel.
Opening the screen
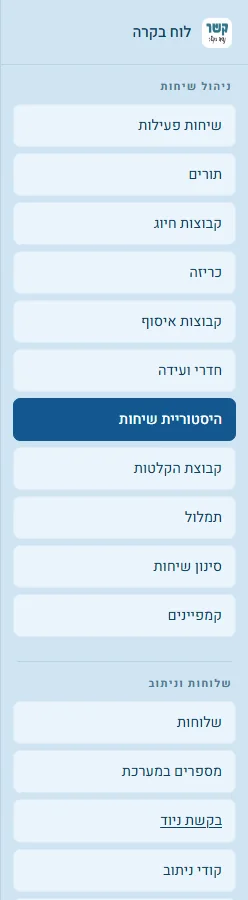
In the control panel, in the side menu, click Call History (in the "Call Management" group). If you don't see the item, you don't have permission for this screen.
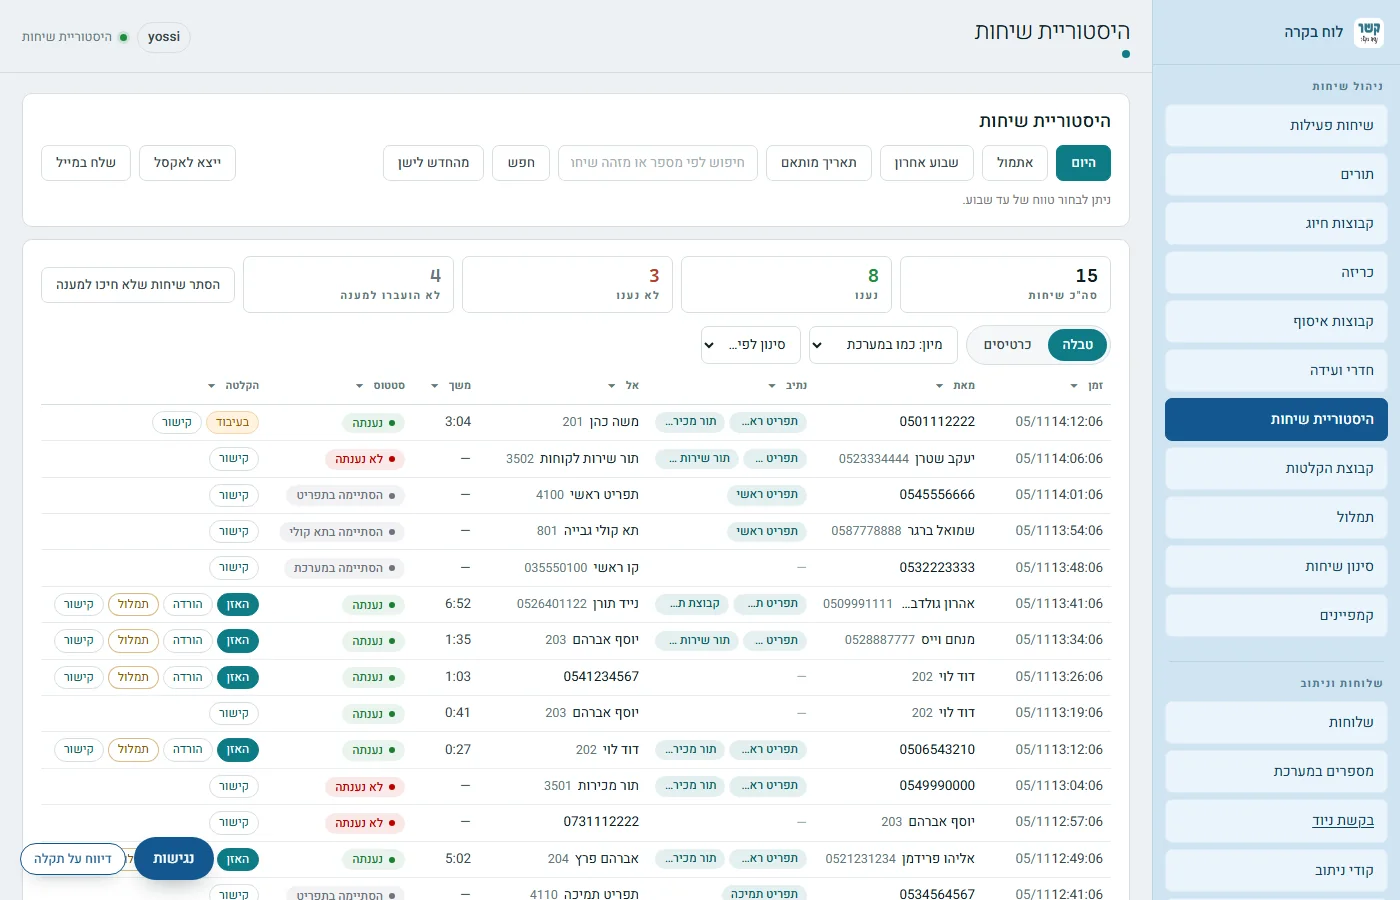
The screen opens with today's calls, newest first. At the top you choose a range and search, below that are the call counts, and after them the list itself.
Choosing a range and searching

- Today, Yesterday, Last week — the range loads as soon as you click.
- Custom date — two fields open, "From date" and "To date", with a time. Choose and click Search.
- Search by number — type a phone number and click Search (or Enter). The search runs within the selected range and finds the number anywhere in the call: the caller, the number that was dialed, the destination, and also a step along the way. You can type the full number or only part of it, with or without the leading 0.
- Search by call ID — if you paste a call ID into the field (for example 1793878323.31822), only that call is shown, regardless of the selected range. To return to the list, clear the field and click "Search".
- Newest to oldest / Oldest to newest — the order in which the calls are loaded and shown.
Calls load in 6-hour parts and are added to the list as they arrive. As long as the message "Still loading — not all calls are shown yet" appears, the list and the counts are not complete yet. If part of the range didn't load, a message appears with the missing hours and a "Try these parts again" button.
The counts at the top of the list, and hiding calls that did not wait for an answer

- Total Calls — all the calls shown in the list.
- Answered — someone answered: an extension, an agent or an outside number.
- Not Answered — only calls that rang somewhere and nobody answered.
- Not sent to be answered — calls that didn't reach anyone who was supposed to answer: they ended in a menu, in voicemail or in the system.
A call "waited for an answer" if it reached an extension, an outside number, a queue or a hunt group. The Hide calls that did not wait for an answer button hides all the rest — for example someone who called, heard the menu and hung up. That leaves only the calls that someone was supposed to answer. Clicking again ("Show all calls") brings everything back, and the choice is kept when you change the range or search.
The table, and what each status means
Each row is one call, even if it went through several steps along the way.
| Column | What you see in it |
|---|---|
| Time | The day, month and time the call started. |
| From | Who called — the name if it is known, with the number next to it. |
| Route | The steps the call went through: menu, queue, hunt group. The first two are shown, plus "+2" (for example) if there are more. The full route — on mouse hover, on the card and in the call details. |
| to | Where the call ended: whoever answered, or the step where it ended. |
| Duration | The length of the conversation itself, from the moment it was answered. A call that was not answered shows a dash. |
| Status | What happened to the call (see below). |
| Recording | The recording buttons, and a Link to the call (steps 7 and 8). |
The statuses
- Answered — someone answered the call.
- Not answered — the call rang at an extension, a queue, a hunt group or an outside number, and nobody answered. A call that rang at an extension and went on to its voicemail is also "Not answered" — someone was supposed to answer.
- Ended in a menu — the call ended in a menu, for example when the caller hung up during the message, without reaching anyone who answers.
- Ended in voicemail — the call reached a voicemail box (for example through the menu) without ringing anyone.
- Ended in the system — the call ended at another stage of the PBX, for example a recorded message, a routing code or a hang-up right at the start.
Sorting, filters and the card view
Sorting: clicking a column heading sorts by it. For time and duration, the first click shows the newest or the longest first; for text columns, alphabetical order. A second click reverses the order, and a third cancels the sorting. You can also pick from the "Sort" list above the table, for example "Duration · High to low".
Filters: the ⏷ symbol next to each heading opens a small window. For status and recording you tick which values to show; for time and duration you choose a range (duration is written in minutes and seconds, for example 1:30); in the other columns you type text to search for, and when there are only a few different values you tick them in a list. Click Apply.
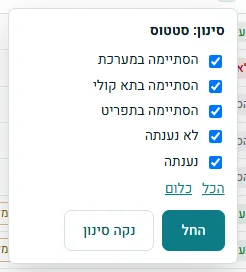
When a filter is on, the line above the list says how many calls are shown out of how many, with "Clear filter" next to it. Your choices of view, sorting and filters are saved in this browser, and stay for your next visit.
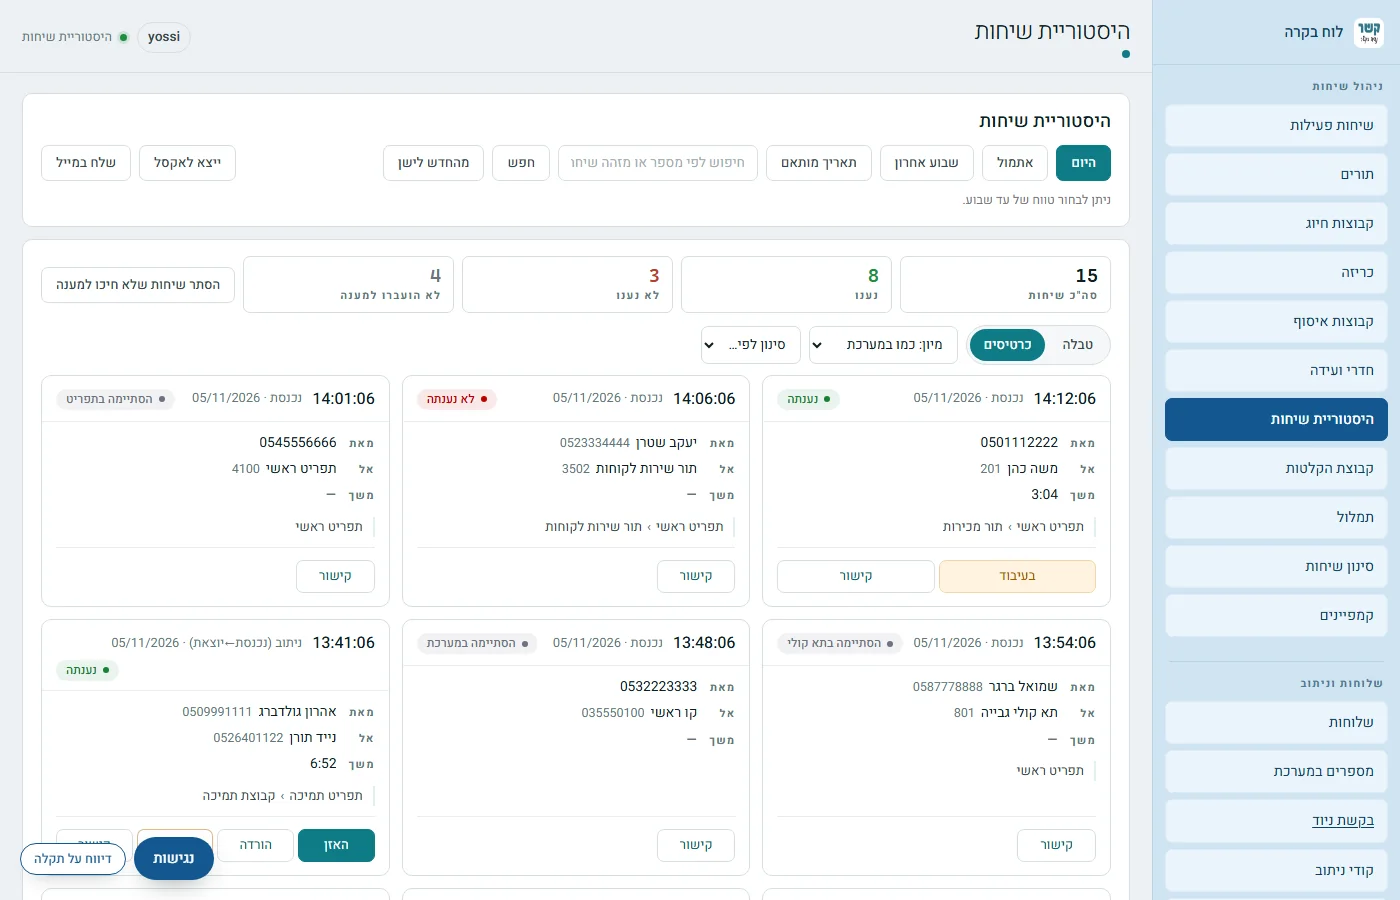
Cards
The Table and Cards buttons above the list switch the view. A card shows the time, the call type (incoming, outgoing, internal, or routing — a call that came in and was sent on to an outside number) and the date, the status, from, to and duration, the full route, and at the bottom the recording buttons and Link.
Call details
Clicking a row or a card opens the Call details. With the keyboard: move to the row with Tab and press Enter. The window closes with Close, with Esc or by clicking outside it.
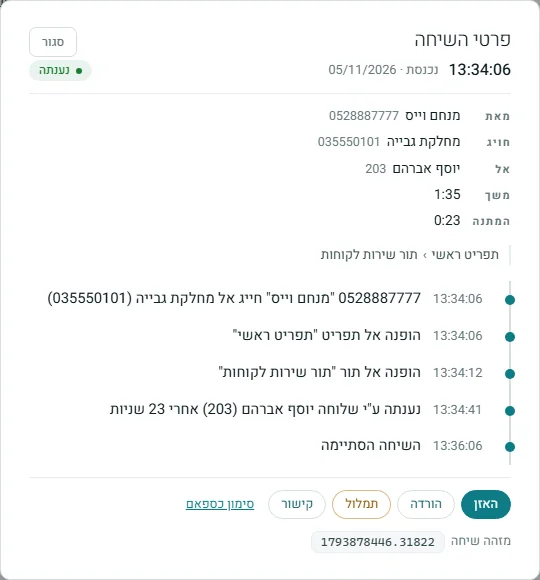
From top to bottom:
- The heading — the time, the call type and the date, and the status.
- From, Dialed (the number the caller dialed — shown when it differs from the destination), To and Duration.
- Wait — how long the caller waited: from entering the queue (or from the start of the call) until the end, without the conversation itself. Shown only for a call that waited for an answer.
- The full route — all the steps, one after the other.
- What happened in the call, with the times — who called and which number, which menu, queue or hunt group the call was sent to, and who answered and after how many seconds of ringing. If nobody answered — why (not answered, busy or unavailable) and where it rang, where the caller hung up (in the menu, while waiting in the queue), or that the call reached voicemail. Only the important points are shown, without the technical steps.
- The buttons — Listen (the player opens inside the window), Download, Transcribe, Link, and on an incoming call from an outside number — Mark as spam.
- Call ID — clicking it copies it.
Mark as spam
The "Mark as spam" link asks first: "Block it for you and send it for the service manager to check?". After "Yes", "Blocked for you, and sent for checking." appears. Marking works after joining the call filtering service, and the link appears only to someone with access to the Call Filtering screen (and not to a view-only user). The details are in the Call Filtering guide.
Recordings: listening, downloading and transcription
If the call was recorded, the "Recording" column (and the card) shows the buttons:

- Listen — a window with a player opens, and the audio starts within a few seconds. The list itself does not move.
- Download — saves the recording as an MP3 file. Shown only to someone with download permission.
- Transcribe — turns the call into text. The details are in the transcription guide.
A row without a recording shows only Link. If the call was recorded but the recording's retention time has passed, a message says the recording is not available. What is recorded and for how long — in the Recordings guide.
A link to a call
The Link button — on the row, on the card and in the call details — copies a direct link to the call. You can paste it into an email or a message, for example to a colleague who needs to handle the request.
Whoever opens the link reaches the call history, after signing in to the control panel and according to their permissions — and the call details open right away. The list shows only this call; the Show all calls from around the time of this call button adds the calls from the same time, with the call from the link marked among them.

Export to Excel and sending by email
Both buttons at the side of the toolbar work on what the list shows: the same range, the same order, and after hiding and filters.
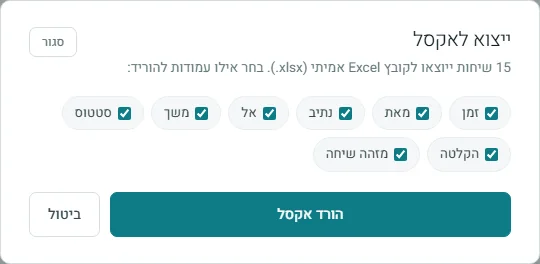
- Export to Excel — choose columns and click Download Excel. An Excel file (.xlsx) downloads. The "Recording" column says whether there is a recording, and you can also add the call ID.
- Send by email — fill in recipients, a hidden copy and a subject, and choose columns. "Send" copies a formatted table and opens your email program; paste it into the body of the email with Ctrl+V. If pasting didn't work — "Copy Formatted Text" and paste again. The recordings themselves are not sent.
Call history on a mobile phone
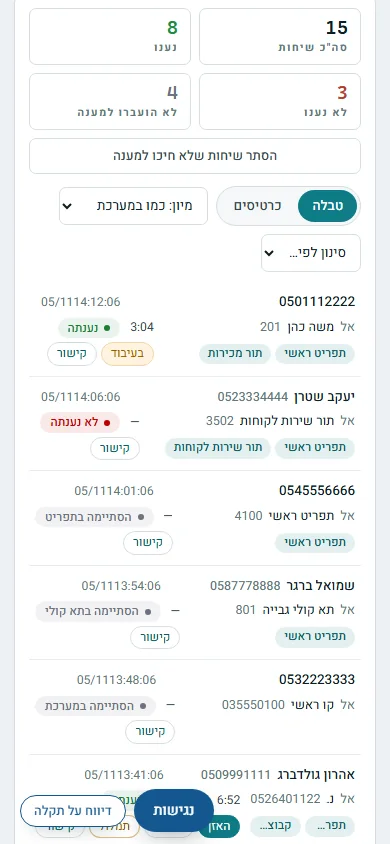
On a narrow screen each call is shown in a few short lines: at the top who called and the time, below that the destination, duration and status, and at the end the route and the buttons. Tapping a call opens the call details, just like on a computer.
Stuck? Does something on the screen not behave like in the guide? Write to us through the Contact Us page. We'll be glad to help, and also to hear what's missing from the guide.