Hunt Groups: several destinations ring on one call
A hunt group rings several destinations — extensions, mobiles, lines — in stages that you set. Whoever answers first gets the call. There is no waiting queue: the caller hears ringing (or music, if you chose it) until someone answers.
What is a hunt group
A call that reaches a hunt group rings at several destinations in the order you set. First, stage 1: all the destinations in it ring together. If none of them answers, it moves to stage 2, and so on. The first to answer gets the call, and the ringing stops at the others.
The difference from a queue, in one sentence for each side:
- A queue keeps the caller on hold and distributes calls among agents by load. It suits a call center with several simultaneous calls.
- A hunt group simply rings. There is no waiting and no "your place in line" — the caller hears ringing until someone answers. It suits "let the phone ring on my mobile too" and small teams.
The groups screen
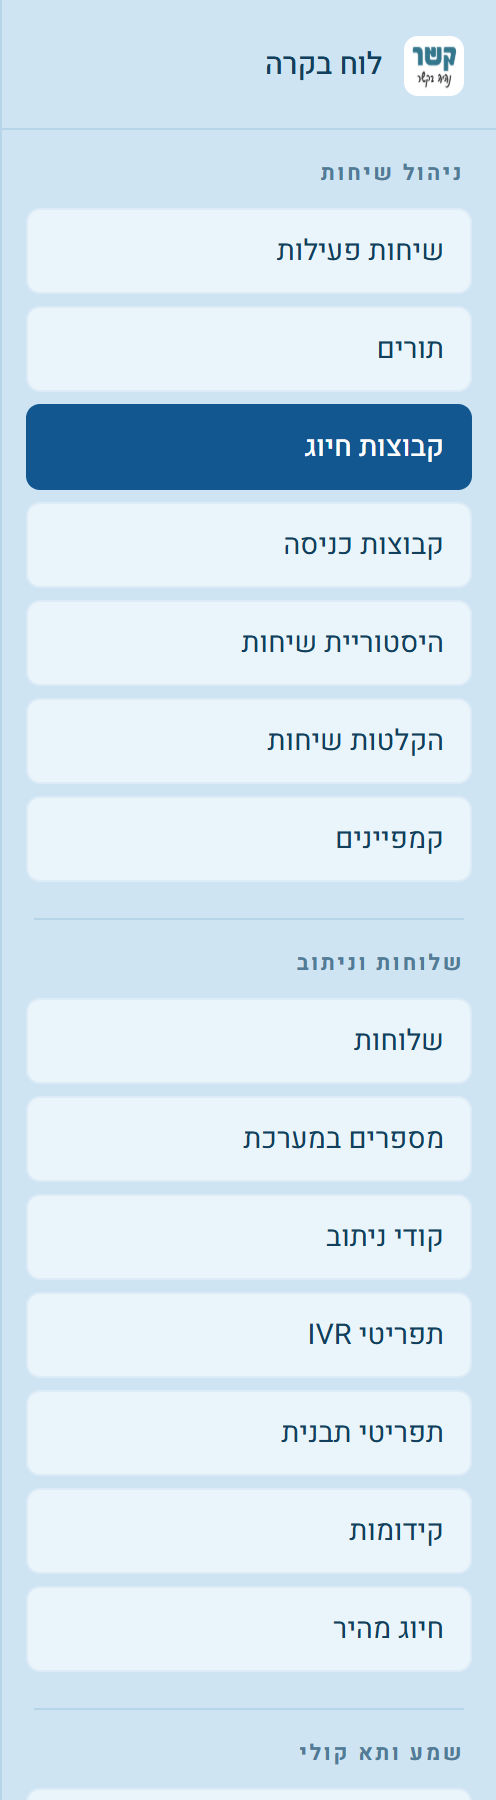
In the side menu, in the "Call Management" group, click Hunt Groups. Each group is shown in a card, and at the end is the card for creating a new group.
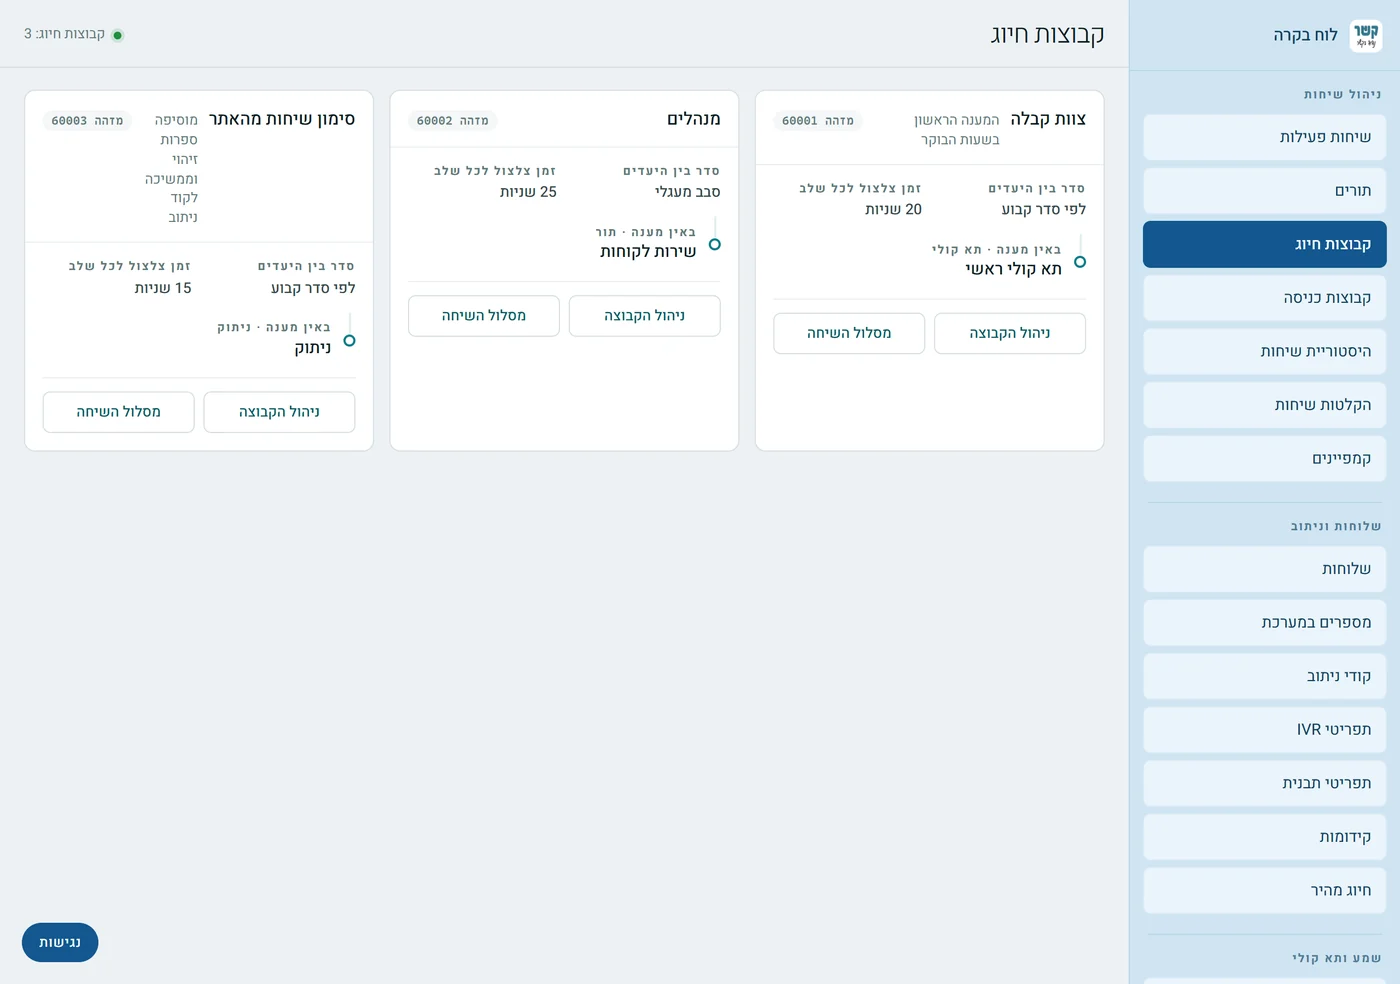
Above the cards is a toolbar: Search the list, switching between Cards and Table view, Sort, and Filter by column.
What you can see on a card, without opening anything:
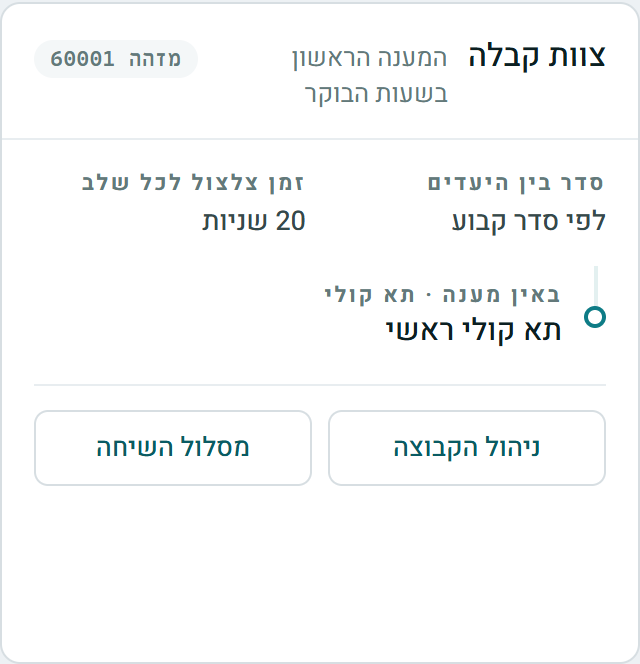
- Name and description — what you called the group, and its permanent ID in the PBX.
- Order between destinations and ring time per stage — the behavior in brief.
- If no one answers — where a call that no one answered continues, and the destination type.
- Manage Group opens the editor (for users with edit permission); Call Route opens the diagram from the group; Link copies a direct link to the group.
Create New Hunt Group
In the "New Hunt Group" card, click Create Hunt Group. A window opens that asks only for a name — type it and click Create Group.
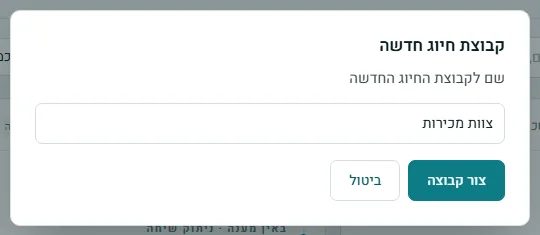
The group is created right away and its editor opens — now add destinations to it and set the other settings. When the account has no groups yet, the New Hunt Group button appears in the middle of the screen.
You can also create a group while choosing a destination on another screen, with the "Create New Hunt Group…" option (see the Numbers guide).
Basic settings
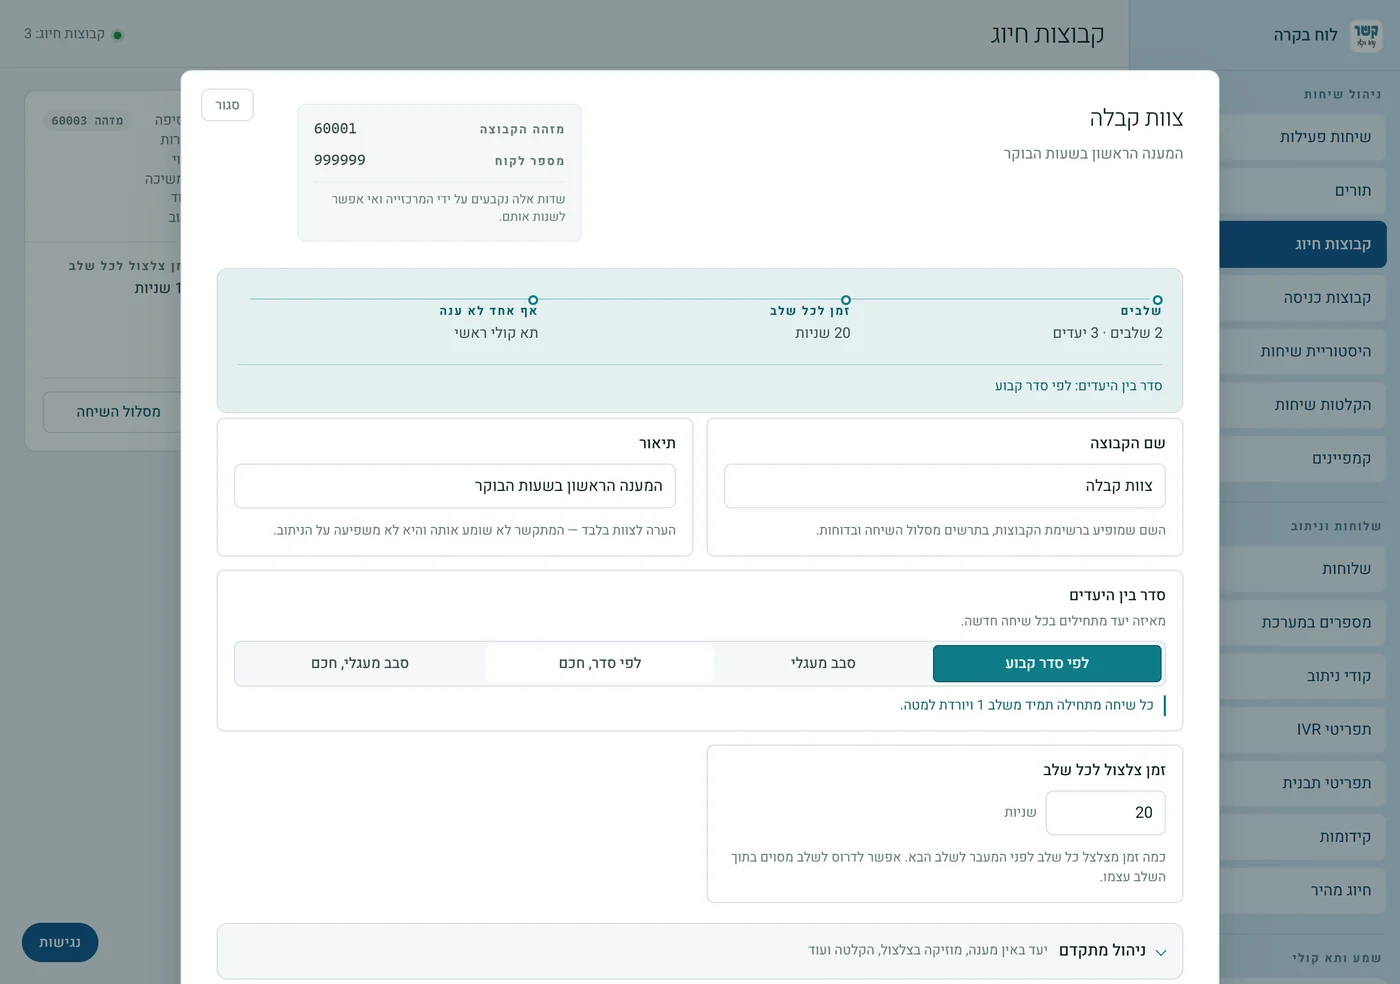
At the top of the editor are two locked fields that the PBX sets: Group ID and Customer number. Below them is a summary strip: how many stages and destinations there are, the ring time per stage, where the call continues if no one answered, and the order between destinations. After it come the settings:
| Setting | What it does |
|---|---|
| Group name | The name shown in the groups list, in the call route diagram and in reports. Required. |
| Description | A note for the team only. The caller does not hear it and it does not affect routing. |
| Order between destinations | Which destination each new call starts from. See the next table. |
| Ring time per stage | How many seconds each stage rings before moving on to the next stage. You can override it for a specific stage inside that stage itself. |
The four options for Order between destinations:
| Option | How it behaves |
|---|---|
| Fixed order | Every call always starts at stage 1 and works its way down. The destinations in stage 1 get the most calls. |
| Round robin | Every call continues from the destination after the one that took the previous call, so the load rotates. |
| Fixed order, smart | Like "Fixed order", but skips destinations that are currently on a call instead of waiting for them. |
| Round robin, smart | Like "Round robin", with the same skipping of whoever is currently on a call. |
The other settings are under Advanced Management (steps 7 and 8). At the bottom of the editor: Save Changes and Call Route.
Ringing stages
The heart of the group, in the "Ringing stages" panel. All the destinations in the same stage ring together (next to the stage it says "ring together"); only if none of them answered does the call move on to the next stage.
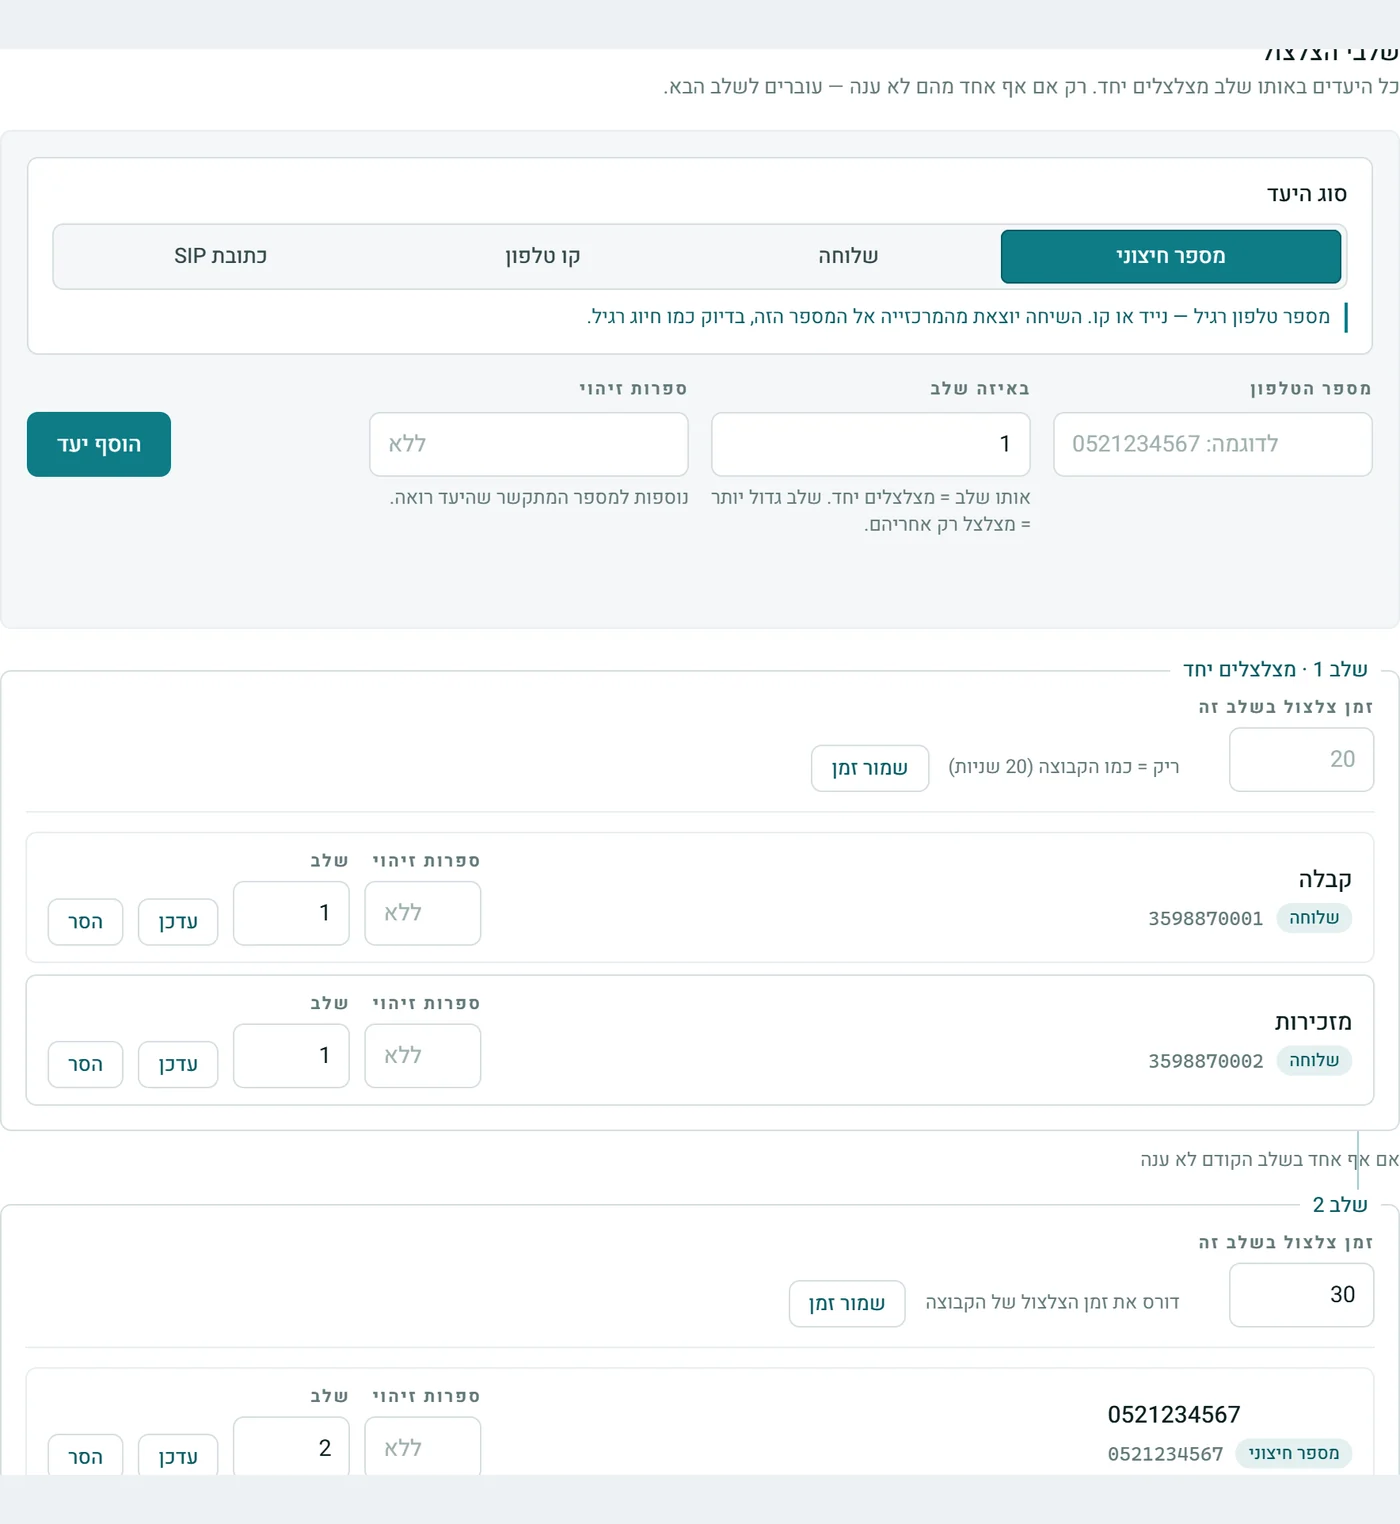
- Ring time for this stage — empty = the group's time (the number of seconds is shown next to it). A value of its own overrides the group's time for this stage only — for example, a short stage 1 for extensions and a longer stage 2 for a mobile. Save with Save Time.
- Stage — next to each destination. You can move a destination to another stage and save with Update.
- ID digits — added to the caller's number that the destination sees. This way, whoever answers on a mobile knows the call came through the group (for example, adding 77 means you see the number with 77 at the end). They are also saved with "Update".
- Remove — removes the destination from the group, after a confirmation question.
Adding a destination
The add row is at the top of the stages panel. Choose the Destination type — a short explanation of the type appears below your choice — fill in the details and click Add Destination:
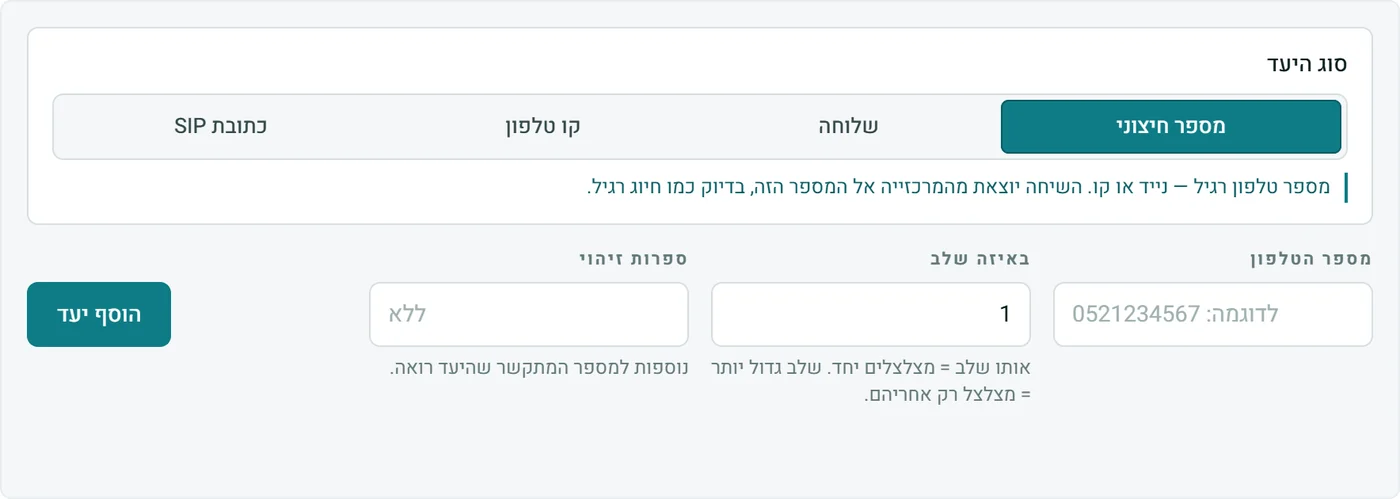
| Destination type | When to choose it |
|---|---|
| External Number | A mobile or a regular line. The call goes out from the PBX to the number — just like a regular call. Type the number. |
| Extension | A phone line of the account, including its settings: if it does not answer, is on "Do Not Disturb" or is set with forwarding — those settings apply. Choose the line from the list. |
| Phone Line | Rings the device registered on the line directly, without going through the extension's settings. Choose it from the list. |
| SIP address | A direct connection to an external SIP address. For advanced users only. |
- Which stage — 1 to 10. Same stage = ring together; a higher stage rings only after them.
- ID digits — optional (see the previous step).
Adding, updating and removing are saved to the PBX immediately — they do not wait for the "Save Changes" button of the settings.
No answer — where it continues
All the stages rang and no one answered? The call does not disappear — it continues to the destination you set. Open Advanced Management; the first group in it is "No-answer destination": choose a destination type and the destination itself.
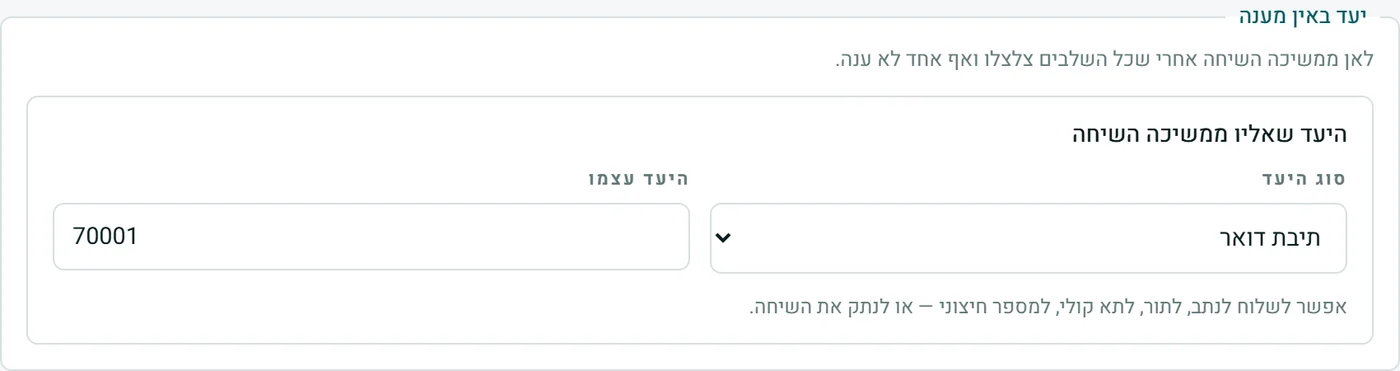
You can send it to an IVR menu, a queue, a voicemail box, an external number — or hang up. And if the destination you wanted does not exist yet, the list ends with an option to create a new IVR menu, queue or group without leaving the editor. Next to a selected destination, Edit Destination appears; it opens the destination's settings in a window above the editor (see the Numbers guide).
What callers hear while it rings, recording and control
The other two groups in "Advanced Management":
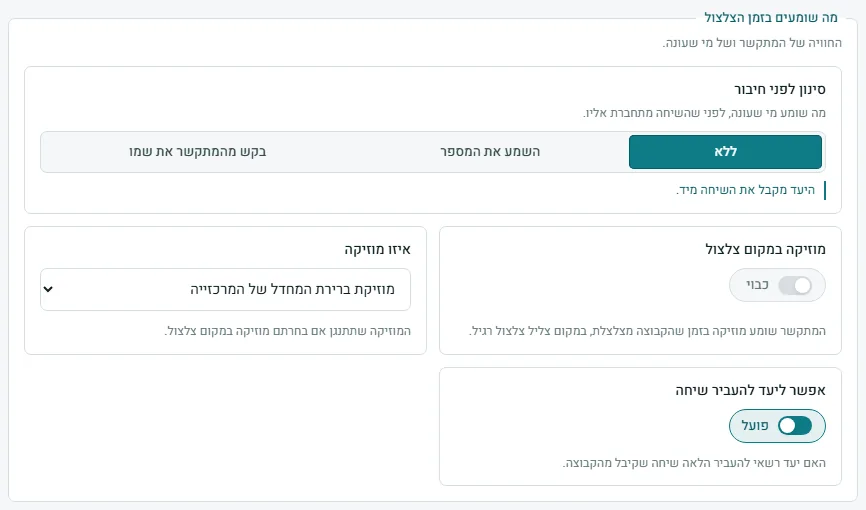
| Setting | What it does |
|---|---|
| Screening before connecting | What the person who answers hears before the call connects to them: None (immediately), Play the number, or Ask the caller for their name. |
| Music instead of ringing | The caller hears music while the group is ringing, instead of a regular ringing tone. |
| Which music | The music that plays if you chose music instead of ringing. |
| Allow destination to transfer a call | Whether a destination may transfer onward a call it received from the group. |
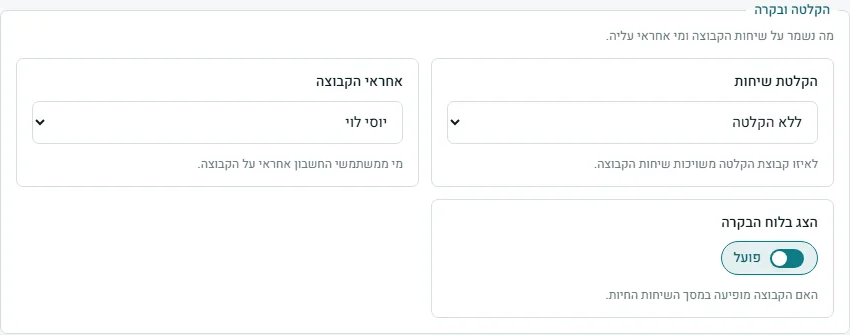
| Setting | What it does |
|---|---|
| Call recording | Which recording group the group's calls belong to, or "Not recorded". See the Recording guide. |
| Group owner | Which account user is responsible for the group. |
| Show in the control panel | Whether the group appears on the active calls screen. |
Who reaches the group, and the call path
Further down the editor is the "What leads to this group" panel: every number, IVR menu, code or queue that leads to it — with the exact path ("Key 3", "Default destination", "On leaving the queue"). Next to each row is Call Route, which draws the full path from that source.

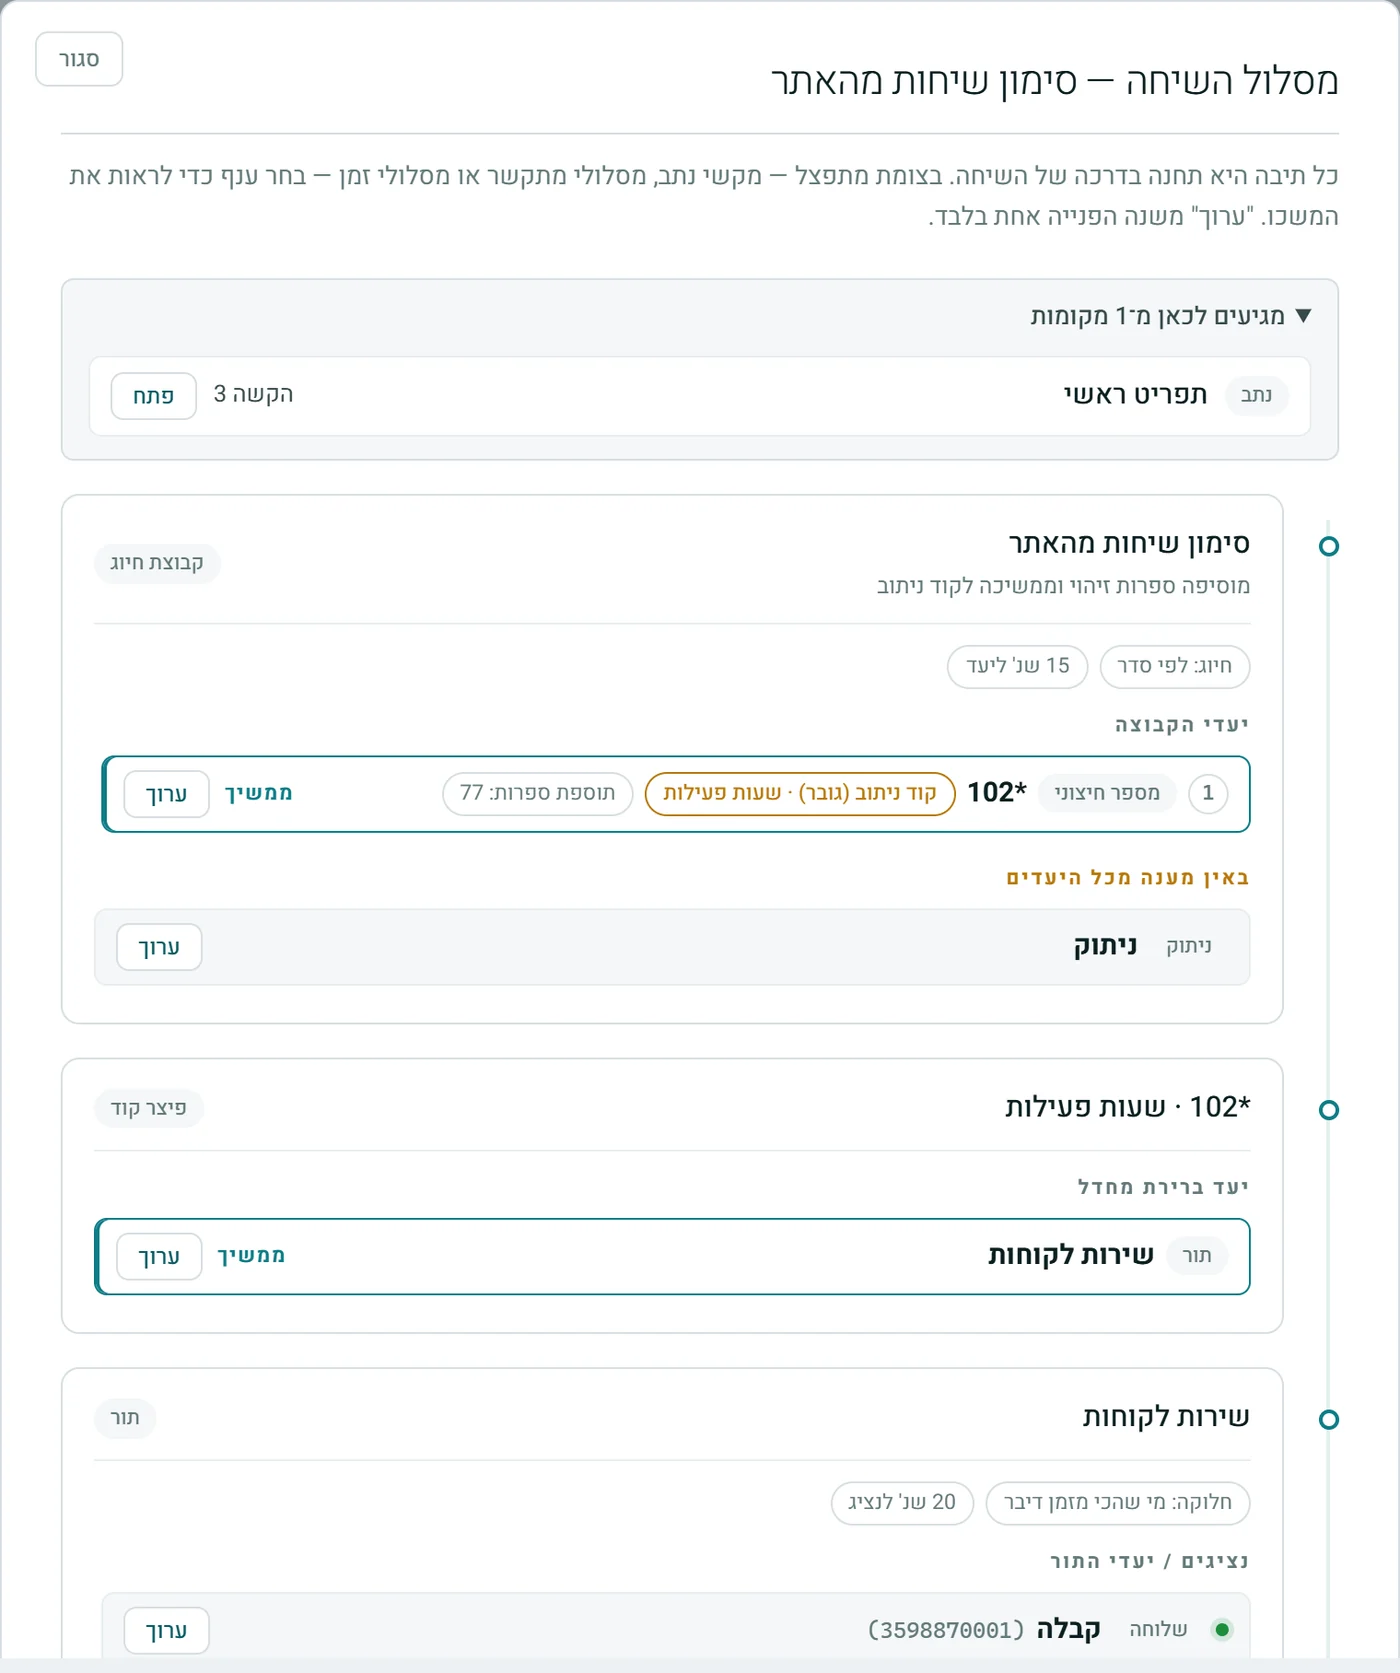
Call Route — on the card or in the editor — opens the full diagram: at the top, "Reached from" with the sources, then the group with its destinations by stage (including the ID digits), and at the end "If none of the destinations answer". At the top of the group box is Go to Setting, and next to each destination is Edit, which changes only that destination.
Saving and permissions
- The basic and advanced settings are saved with Save Changes; the destinations and stage times are saved immediately with each add, update or removal.
- Only the settings you actually changed are sent to the PBX. If you close the window with an unsaved change, you will be asked before the change is lost.
- Creating requires create permission, and editing requires edit permission for hunt groups. Without edit permission, "Manage Group" does not appear on the card.
Stuck? Does something on the screen not behave like in the guide? Write to us through the Contact Us page. We'll be glad to help, and also to hear what's missing from the guide.