Actions: Sending SMS, Making a Call, and Sending a Fax
Three actions you do right from the control panel, without picking up a phone: send an SMS from a number on the account, make a call that the PBX connects for you, and send a fax from a file on your computer.
Where it is and who it's for
In the side menu, in the Actions group, there are three items: Send SMS, Make a Call, and Send a Fax. Each one is a small screen with one form: you fill it in and click.
Send SMS
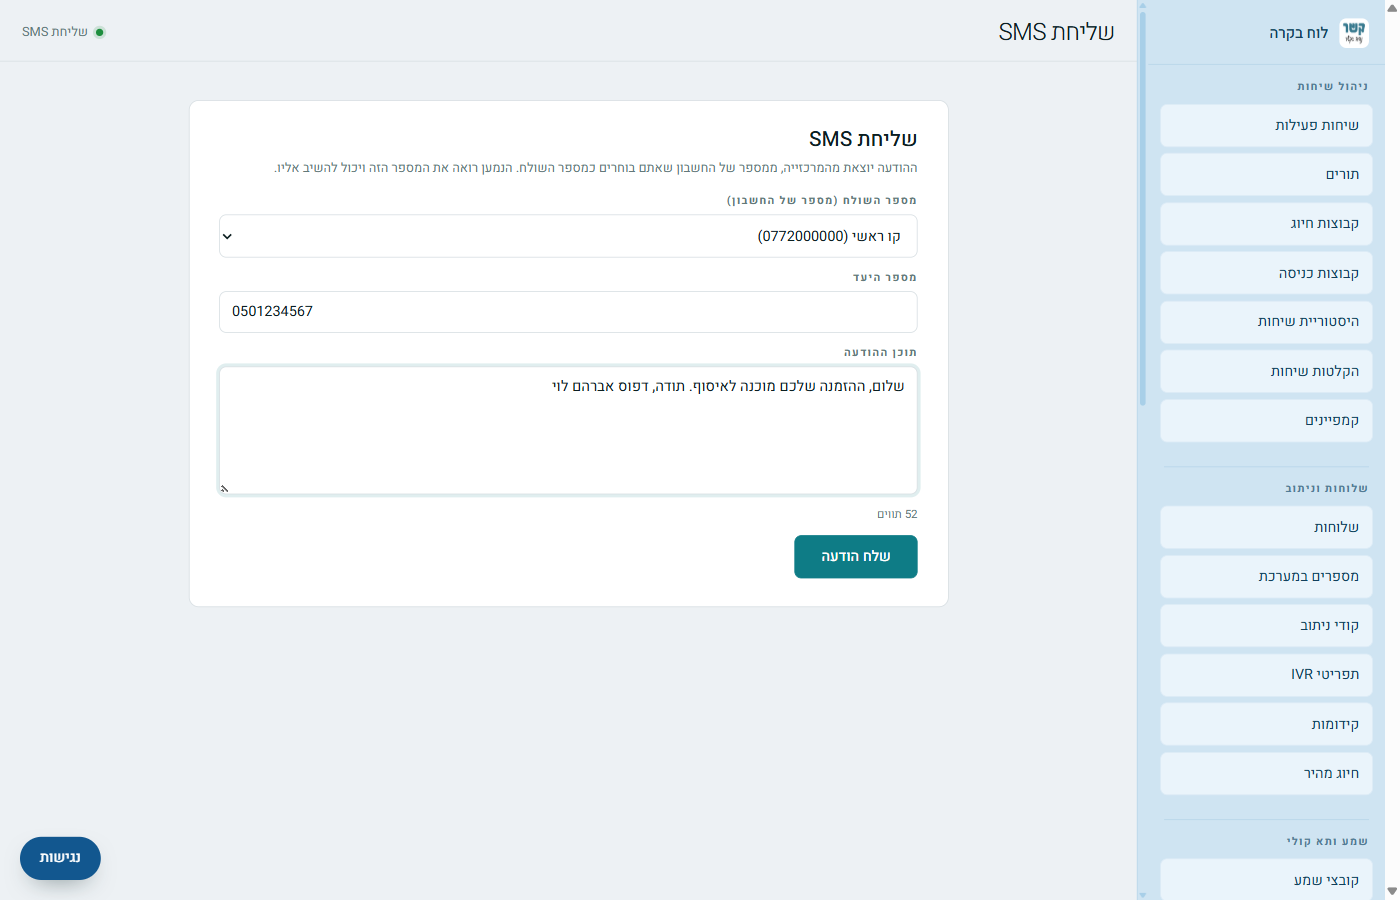
Fill in three fields and click Send Message:
- Sender number: choose from a list of your account's numbers. The list is already loaded and opens ready to use. This is the number the recipient sees on the message, and the one he replies to if he answers.
- Destination number: who you're sending to.
- Message text: the text itself, up to 1,000 characters. A character counter appears below the box.
What SMS from the business number is and why it is useful — in the Knowledge Center.
Make a Call
Here the PBX dials for you, in two steps:
- The PBX first dials you: the extension you chose from the list, or another number you typed.
- When you answer, it dials the destination and connects the two sides.
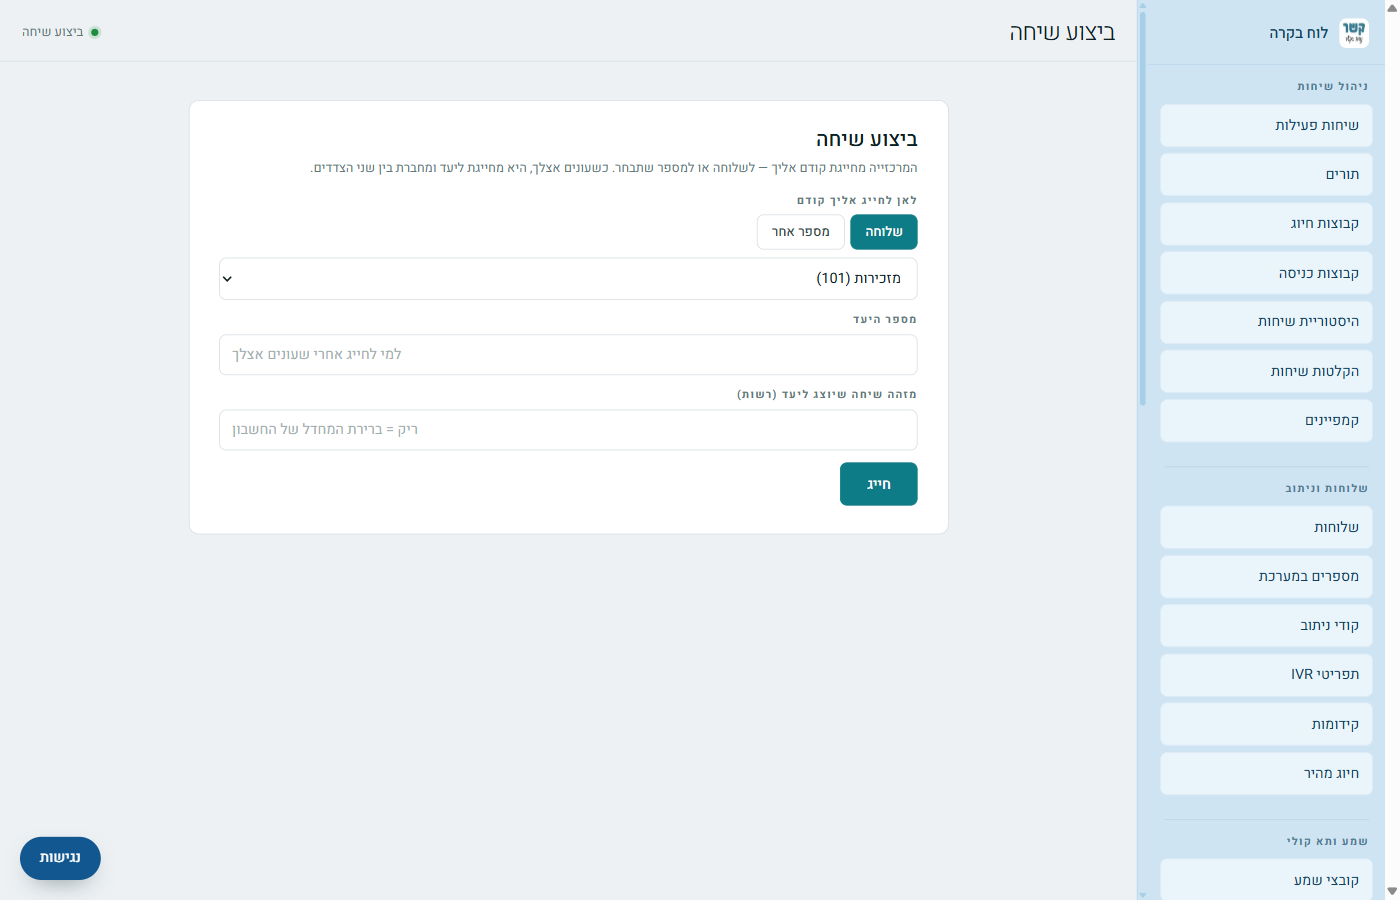
In the Caller ID shown to the destination field you can choose which number the other side sees when their phone rings. The field is optional. When you leave it empty, the account's default is shown.
Extension connected or not connected
In the list of extensions, each extension is marked connected or not connected, and the connected ones appear first. "Not connected" means there is no device registered on the extension right now — and then the PBX won't be able to call it. When you choose such an extension, a note appears below the list: choose a connected extension, or Another number (for example your mobile).
What it says after you click "Dial"
- "Your phone is ringing now" — answer, and the call to the destination is heard right away.
- "You answered — the PBX is now dialing the destination" — the first step succeeded.
- "The PBX accepted the request, but we haven't yet seen the call go out" — if the phone doesn't ring within a few seconds, check that the extension is connected, or try "Another number".
Send a Fax
Type the destination number and choose a file to send. You can send:
- PDF: sent as is, even with several pages.
- Image: JPG, PNG, and so on. A long image is automatically spread over several A4 pages.
- Word document: converted in full, with all its pages.
An image and a Word document are converted to PDF on the server, so there's no need to convert them yourself before sending.
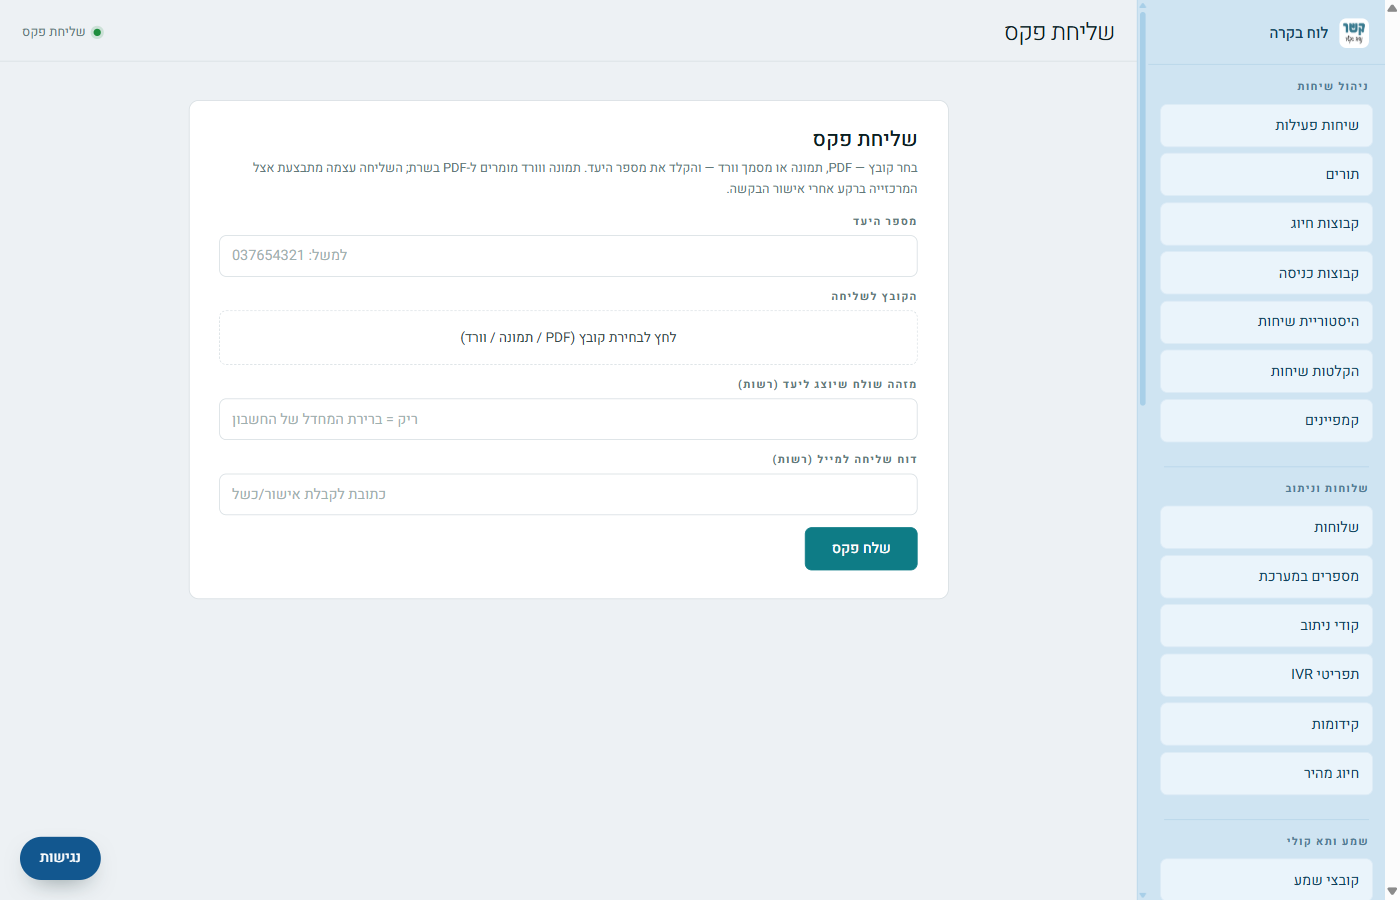
Two optional fields complete the form:
- Sender ID shown to the destination: which number appears for the recipient. Empty = the account's default.
- Send report by email: an address that will receive a confirmation when the fax is sent, or a message if it fails.
Common mistakes
- "Destination number is invalid": check the number itself. Maybe a digit is missing, or a letter got mixed in. There's no need to clean up the format of the number; the system already removes spaces, dashes, and the +972 prefix on its own.
Stuck? Does something on the screen not behave like in the guide? Write to us through the Contact Us page. We'll be glad to help, and also to hear what's missing from the guide.